Math Rocks For Kids!

Math ideas for homeschooling, and All!, kids!

YAHTZEE! Early Education Dice-Play Really Helps Kids With Math!

IMG_5773

There is just something about little dotted cubes that stimulate young minds toward math-related concepts in a really fun way.  Kids learn best when they have a tactile experience that is fun!  I’m writing this post because I have seen first-hand how certain teaching concepts really work with a simple set of dice.

We are a family that plays Yahtzee together.  Captain has been around this particular game often throughout her life, especially when Grandma and Grandpa are visiting, and the Yahtzee games turn into full-fledged tournaments. In fact, Captain actually sat down with her Grandpa a few months ago and played for 2 hours.  It was her first time actually playing her own game.  In the beginning, Grandpa had to keep her on track and kept patiently explaining how she had three rolls to try to come up with a suitable combination.  Midway through, she was making her own decisions and doing everything except adding them up.  It was amazing!

IMG_4738

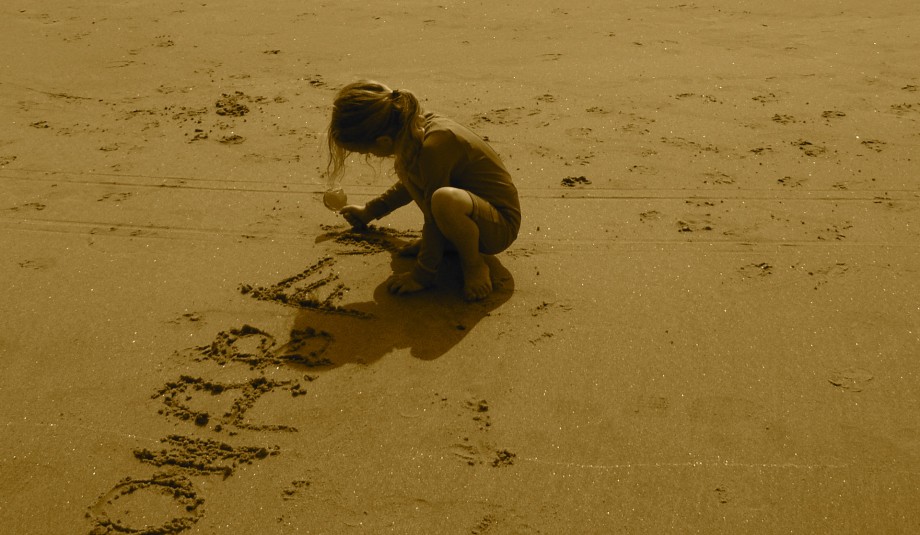
Here she is getting her very first Yahtzee (5 of the same number)

It isn’t just the game of Yahtzee that works.  Playing with the dice with little ones in itself is a terrific stimulator, and then slowly working up from there, as time goes on, does wonders.  Here are some suggestions for simple early education games to teach kids with dice:

  1. Roll a dice.  What number comes before? After?
  2. Is the number even or odd?
  3. Have a piece of paper and pencil handy.  Write the numbers in a different way.  For example, if the child rolls a “6”, have them write the number “6” on the paper etc.
  4. Roll a dice.  What number is ten more?  One less?
  5. Write the numbers 1-6 on small pieces of paper (or use flashcards).  Have the child roll a die and match it to the written number.
  6. Play “Add ‘Em Up”:  Set a goal of 100.  Have the child roll dice to start the game.  The parent will add the numbers as the game goes on.  As the child keeps rolling, point to each dot on the die while counting and add it to your total.  You don’t have to count super slowly, or even make sure that they understand every addition!  It about the stimulation and fun.  It all “goes in there” somewhere and adds to the natural learning process.
  7. If you have a lot of dice around, at least 10 or more, play “Dice Explosion!”  Simply have the child shake all of the dice around and let them “explode” onto the floor.  Then the scramble is on to try to sort them into like groups.  This could be a good release of tension, if there is no pressure to do it too fast…
  8. Play games like “Yahtzee”.  It might be too much for little kids, but I have seen it help kids, teenagers and even adults with their basic adding skills.  Let them try!

There are lots of resources available online for games for older kids and for more advanced concepts.  Just keep those dice rolling!  Definitely check out Shannon Dipple’s article entitled Math Games Using Dice on Primary Education Oasis.  She rocks!

Thanks for reading!  Karen

Categories: Homeschooling Projects, Math Rocks For Kids! | Tags: , , , , , , , , , , , | 10 Comments

Make Your Own Geoboards For Kids!

IMG_3805

We love our geoboard, made with a pegboard and 1″ machine bolts and nuts.  Grab some rubber bands for some fun with designs and shapes!

A geoboard is, basically, a board with pegs (nails or screws) poking out on which kids can make designs, shapes and angles by stretching rubber bands between 2 or more of the pegs.  It is a WONDERFUL tool for having fun creating pictures, and also a great tactile experience for teaching hexagons, pentagons etc.  This is another project that does not require kids to learn every angle and the exact names of each shape, although they can learn more that we’d think!  The act of stretching out designs stimulates the mathematical parts of a brain.

From Wikipedia: “A geoboard is a mathematical manipulative used to explore basic concepts in plane geometry such as perimeter, area and the characteristics of triangles and other polygons.  It consists of a physical board with a certain number of nails half driven in, around which are wrapped rubber bands.  Geoboards were invented and popularized in the 1950’s by Egyptian mathematician Caleb Gattegno (1911-1988).” 

If I read this description to Captain she would probably just walk away.  It isn’t about pushing geometry.  It just brings up one of my favorite things about our idea of homeschooling/unschooling:  brushing up against stimulating ideas with a tactile experience, and letting the crumbs fall where they may.

There are lots of ideas floating around online, and also educators could direct us more, as to various teaching methods using the geoboard.  Our personal favorites are to just have fun making shapes and designs, and also to make a particular shape and name it (square, pentagon etc.)  It is also a fun exercise to make a small shape like a square, and then make the exact shape bigger…

Geoboards can be purchased online, and in educational stores, starting at about 4 bucks for a small, plastic square with plastic pegs, and the price goes up from there.  Many people recycle a scrap of wood and pound in nails until they are poking out about an inch.  We used a pegboard with 1″ machine bolts and nuts.  The machine bolts differ from regular bolts in that they have a flat tip, not pointy.  When we no longer need the geoboard, we will use the pegboard in the barn for tools and the machine screws for another project. We have found that a bigger size (12×12 or larger) is best because it is sturdier and allows for more creative freedom to make cool designs and shapes.  We thought the little plastic geoboards seem too small.  We planned to mount ours onto the wall (they are quite appealing on a wall as a little “station”) but Captain has had so much fun with it on a table, or in her lap, that we are leaving it loose about the cabin for now.  We have a big jar of rubber bands on hand for activities.  It is important to note that rubber bands should only be used by kids who will not swallow them and that can learn to not snap themselves in the eye!

If you have a geoboard, or plan to make one, and have any cool activities to share, we would love to hear about them here on kartwheels.

Good thoughts and happy hexagons,

Karen

Categories: Art Rocks For Kids!, Homeschooling Projects, Math Rocks For Kids! | Tags: , , , , , , , , , , , , , , | 2 Comments

Voila! Make a Light Box For Your Kids!!

IMG_5210

The learning activities, art and fun just might be limitless!

Captain LOVES this!!!!

Okay, there is A LOT of information floating around online about light boxes and their many fabulous uses for kids. My only regret is that I didn’t make one of these when Captain was a toddler!  I apologize that I don’t know who to credit for the way that we put this together, as I can’t remember exactly where I gathered the bits and pieces of information needed to assemble this amazing, simple box.  And so, to all of the people who have made this before, I thank ya!

Basically, it is a lighted box that enables kids to do a large number of activities including learning projects, crafts, and just plain fun.  Some activities include, but are not limited to: Looking at agate slices, sorting colored beads or round pieces of glass (or any clear, cool stuff which is great for the toddler “sorting” phase), transparent geometric shapes, a squirt of shaving cream, colored sand shapes, finger painting, stacking plastic cups in assorted colors and the list goes on….

Method

You’ll need:  a plastic tub with locking lid, no deeper than 6 1/2″, a string of basic rope-lights ,(at least 9′, after Christmas they are on blowout sale), aluminum foil, waxed paper, clear packing tape and something to drill a hole in the plastic box to fit the lighting cord through.  We used a Dremel.

It took about 10 minutes for K and I to put this together.  First, lay out the rope lighting inside the box so that you can gauge where to drill the approximately 1″ hole in a corner that you’ll need for the cord.  Remove the lights and drill the hole.  Place a layer of aluminum foil inside the box on the bottom and sides (this helps concentrate and reflect the light) and tape it down.  Replace the rope light in a neat coil that spreads out over the bottom pretty evenly and tape it down.  On the inside of the lid, tape down a layer of waxed paper.  Put on the lid and plug it in.  Close the curtains and shut out the lights.  Voila!  They’ll come running!!

I have a couple of recommendations on which plastic tub to purchase, as well as a few items that are inexpensive and totally cool for the box:

First, many have made this using a 12×12 scrapbook storage box, but I found it to be kind of limiting so I went for something bigger.  I found a 6.25″ H x 18″ W x 28″D clear plastic underbed storage box made by Iris on Amazon.com and it is perfect.  I bought 2 for 31.99 with free shipping.  If you do find a different tub, make sure that it has a smooth, flat top, not grooved (very important!).

I highly recommend these products both of which I found on Amazon.com, all had free shipping:  Agate light table slices, set of 12 for 18.95.  With these, you don’t know what colors and shapes they will be and it is quite fun to open up the box!  Also, Learning Resources makes a set of view-thru geometric solids for 14.35 and very quickly Captain knew what pentagons and hexagons are.  They are great for filling with little rocks, stacking, sorting, and building things with too.

At any craft store you can get round, glass shapes (like for vases) for sorting and other fun.  Of course these are for kids who won’t try to put them in their mouths…

IMG_5212       IMG_5211

We have just started with this and have yet to discover the possible new activities we could do with this magical, glowing box.  Any of you with light boxes, please let me in on other ideas for activities!  Captain really loves this and thinks I am the coolest mom ever for putting it together for her 🙂

Good Thoughts! Karen

Categories: Art Rocks For Kids!, Homeschooling Projects, Math Rocks For Kids!, Science Rocks For Kids! | Tags: , , , , , , , , , , , , , , , , | 4 Comments

The Best 68¢ Learning Toy for Kids!

IMG_4967

Here it is!  The old-fashioned wooden yardstick: a great learning gift and affordable at 68 cents (Lowe’s). I wrote “To: Captain, Love: Mom” (and added a little heart) on it with a fine-tip black permanent marker to make it a little personal.  She has measured her foot, some rocks, her dog (that was a little dicey) and also used it as a sword and a ramp for her “Scooby & the Gang” figurines to march onto imagination boats made out of chairs. Kids don’t need to be pressured to understand what inches and centimeters are at young ages.  With a fun thing like this, I believe just being around it and playing with it creates interest and little bits and pieces soak in.  After she had this awhile, we had a project involving leaf rubbings and measuring how long they were with a ruler.  She easily jumped to that next step, and being familiar with linear measurement from her “sword” helped I think…. and you can’t beat the price!  What can you get for under a buck these days?  Any ideas?

I highly recommend this for little ones and big ones alike.

Cheers!  Karen

Categories: Homeschooling Projects, Math Rocks For Kids! | Tags: , , , , , , | Leave a comment

Blog at WordPress.com.