When my daughter painted her very first still life, it was amazing to watch her really envelop herself in the whole process, and have so much fun doing it. She arranged her fruit, mixed her own paints with 3 primary colors, sketched, and then painted, her subject. Watching her delight as she discovered that adding a few simple lines gave the bowl depth was priceless. It was such a wonderful experience for both of us, that I would like to share our version of a still life painting “learning unit” for kids. This is just what we did, you can adjust along the way to suit the child’s needs. This is a project to delve into when the child is relaxed and feeling creative. This is not a project to do today if mom or kiddo is feeling rushed. Early still life painting is special and needs as much time as it takes. Here goes!
Supplies to have ready: bowl, fruit, pencil, powdered tempura paints in red, yellow and blue, paint smock or old shirt, paint brushes, newspapers, black marker, glass of water and rag to rinse brushes, thick paper suitable for paint, popsicle sticks or spoons for mixing the paint, and a small plastic palette or little cups for the paints.
Step 1. We talked about what a still life is, as we gathered materials. Basically, a still life is a picture of inanimate objects, such as fruits, flowers, books, etc., usually grouped on a flat surface. I also took this opportunity to reiterate the terms “landscape” and “portrait” in terms of placement of the paper. Portrait is when the shorter side of the paper is at the top, and landscape is when the longer side is at the top.
Step 2. Captain chose a bowl and as she arranged her fruits just so, I took a moment to talk about the term “arrangement”. Help your child take the time to arrange, and not just throw the objects in the bowl or on the counter. This is a still life, and composition is important. I told her that an artist usually takes their arrangement very personally. How the artist places the fruit is important for composition. (I didn’t explain exactly what “composition” means to her at this time, just threw it right out there with everything else.) We were low on fresh fruits, so we used some plastic bananas and grapes to fill it out. She really enjoyed placing everything just so. She took her time with the arrangement and decided that the grapes were too squished-looking by the pear, and changed it around and placed the banana gently on top. Voila! Now THAT is how we arrange things. Fantastic! Make sure there is good lighting for the objects. A small lamp can even be used to enhance the light source. Before she started sketching, we talked about lighting and depth. “See how the light shines from one direction and changes the colors and makes shadows?”
Step 3. Captain sketched her still life by drawing a large circle for the bowl in pencil, and then drawing many circles bunched together for grapes, and other shapes for the rest of the fruit. It was great! After she sketched, we took a break and then returned to mix the paints.
Step 4. From the 3 primary colors we had, Captain was able to make all of the colors she needed to paint her still life. She measured out about a teaspoon of powdered paint into her cups and mixed water, a little at a time, to make her colors. (I wish I had offered her a dropper to use for the water as I think she would have really liked using one with the paints. She could take her time and add drop by drop, because that works with her personality!) She needed red, green, purple, yellow and orange to complete her project. She mixed her colors and painted her fruits and bowl. This is a good time to remember that red and yellow make orange, and so on! The painting looked wonderful already!
Step 5. The paints dried quickly, and, after a snack, we talked about outlining the fruits to give them more drama. It was just a choice that I offered to her and she leaped to the idea immediately. We didn’t have black paint on hand, and she was ready for a change, so she used a black marker to outline each fruit and to add a line inside the bowl to give it more depth. She was amazed by this. I held it up before she drew the line, and after, so she could see the difference, and she exclaimed “Wow! It really looks like a bowl!!!”
Step 6. After lots of ooohs-and-ahhhhs over the painting (!), now is the time to ask the child if they would like to give their still-life a name (always refer to it as a “still life” and not “picture”). Captain didn’t want to give hers a name and so we called it an “untitled painting” and talked about it. I have found that kids like to discuss their paintings after they are done. She wanted to talk about the colors, the arrangement and how she felt while she was doing it. She was positively lit right up! I just can’t express how cool it was to be with her while she talked about her art with such animation. We hung it right up and she couldn’t stop admiring it. When her dad came home, he barely got into the door when she rushed him over to admire it. Even now, a few months later, when someone comes visiting she often takes them right to her still life to tell them all about how she did it. She is so proud and I am even more proud than she is!

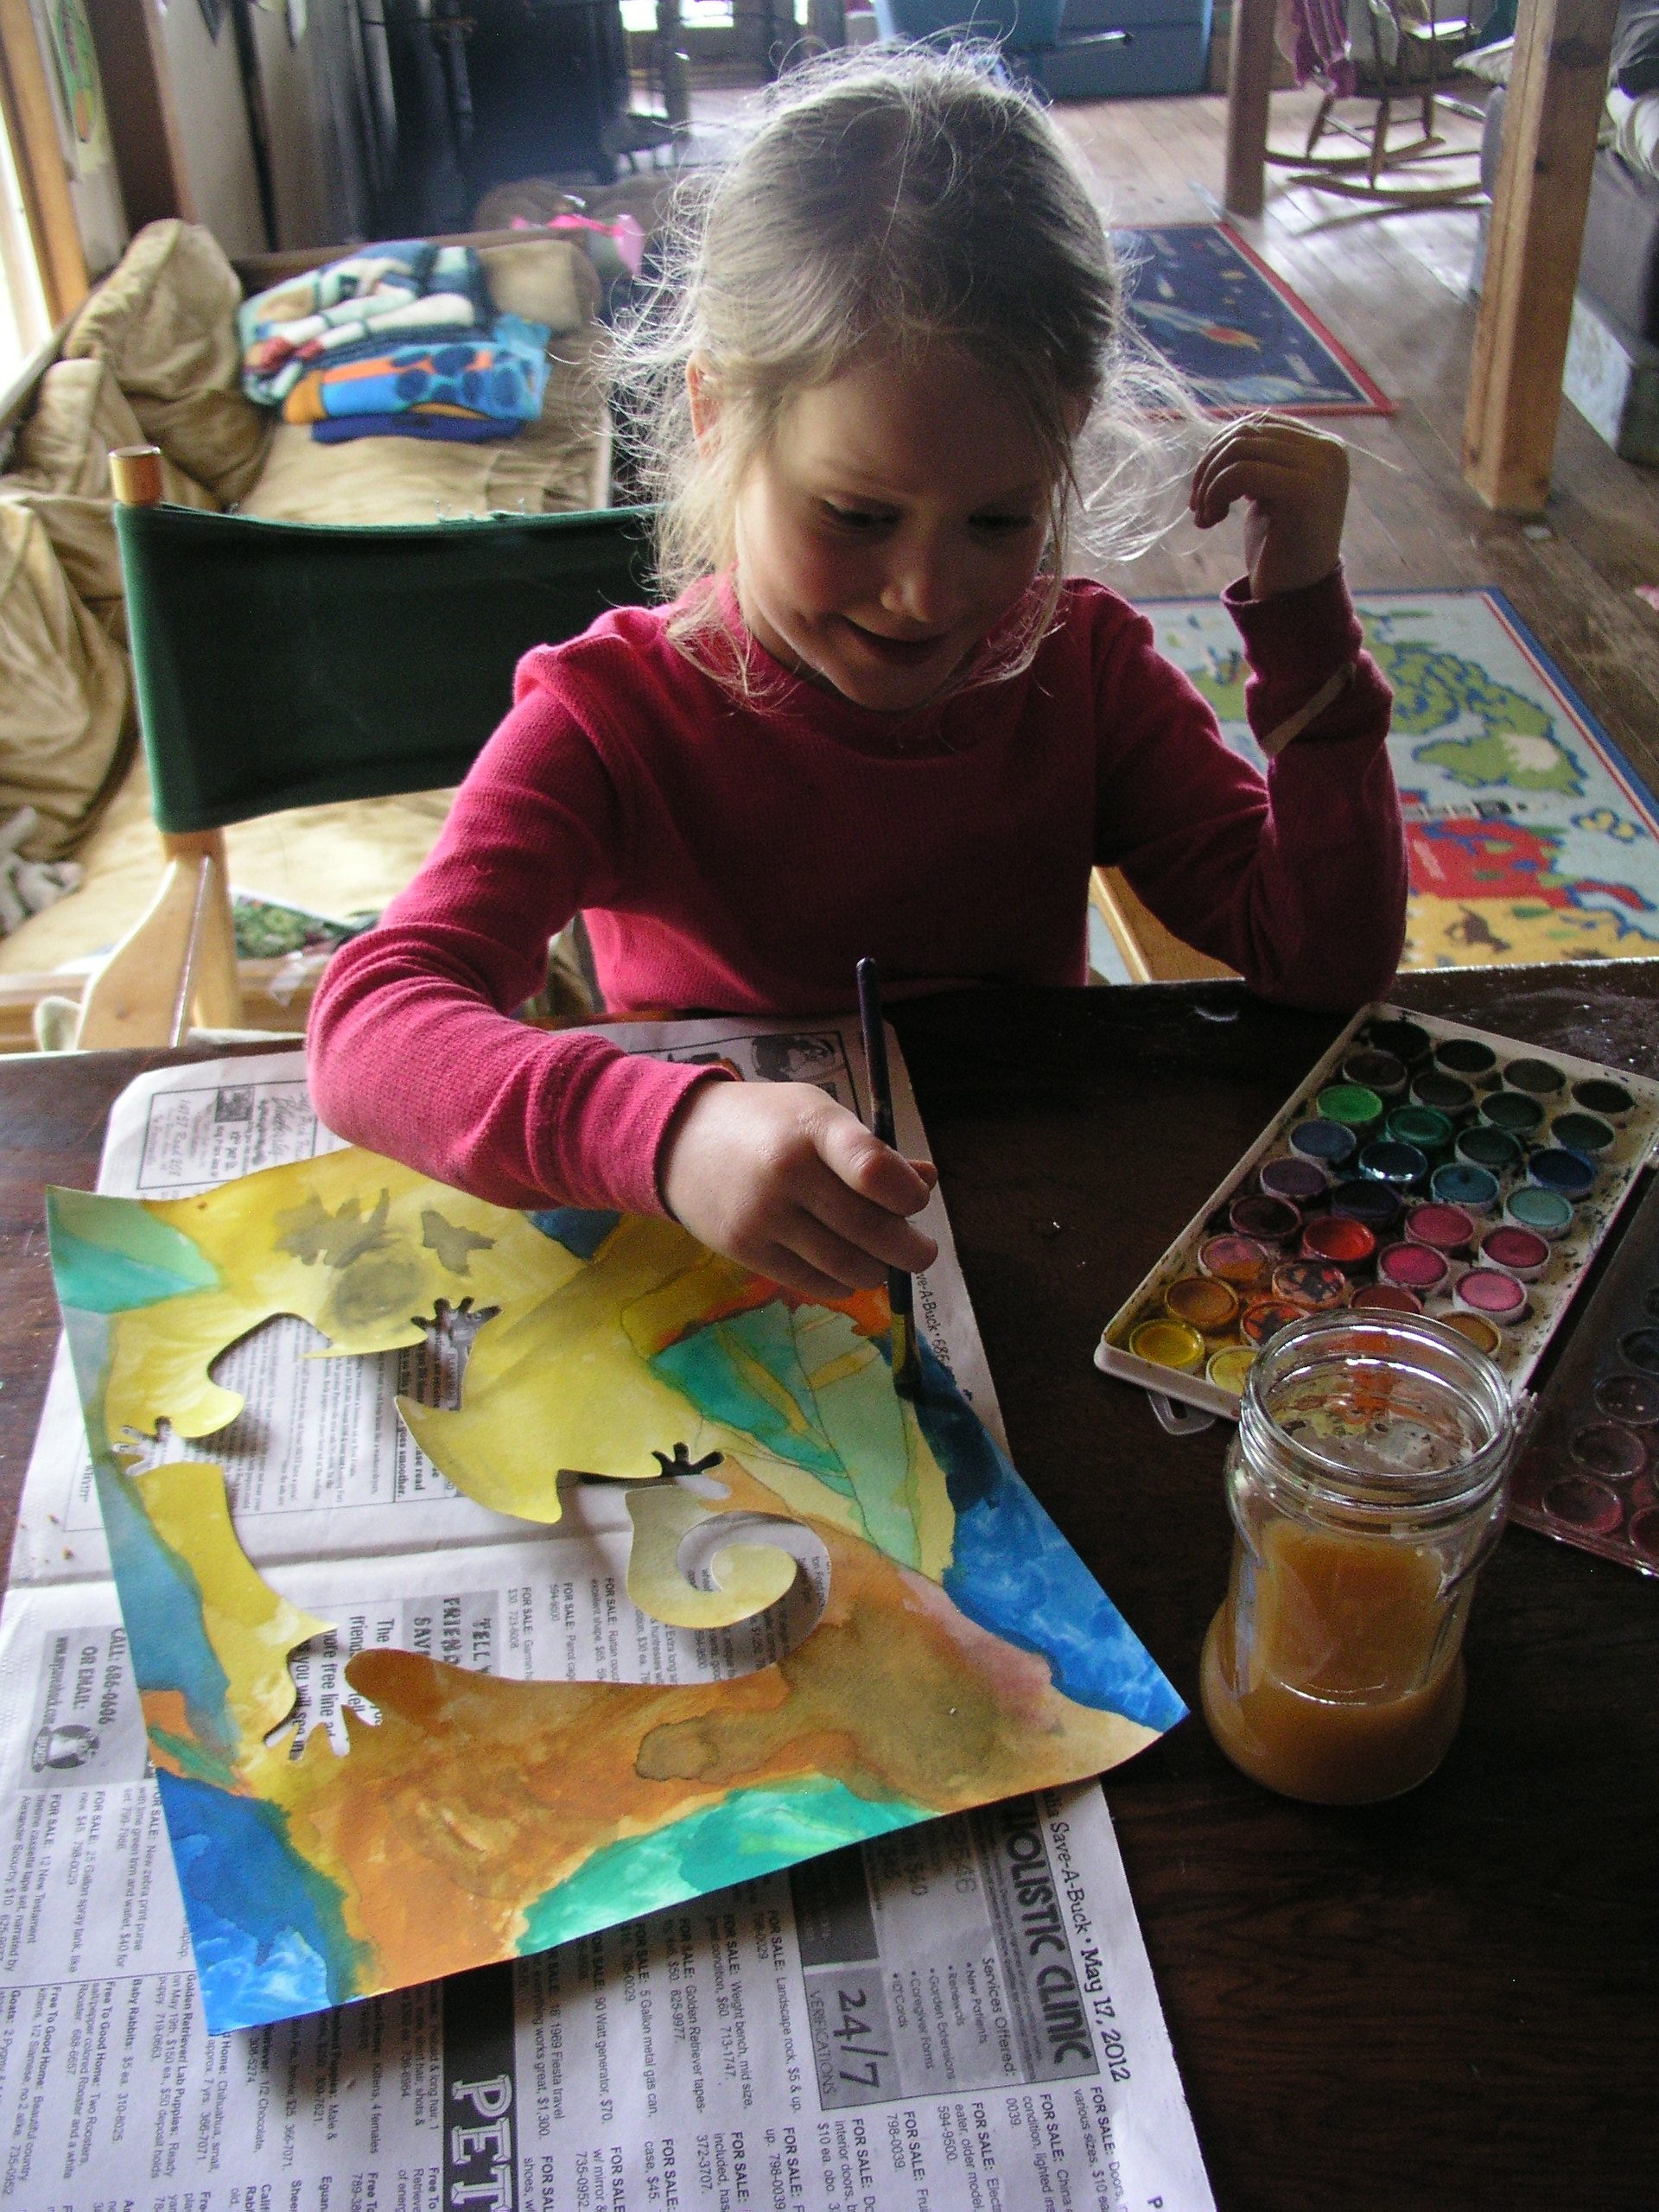
Captain’s very first still-life! She LOVED this project and wants to do more and more…
After the fact, it is wonderful to show some examples of famous still lifes throughout history. I prefer to show Captain other artists’ works after she has done hers. I just want art to be pure and open for her so that she can approach things with her own creative mind and heart, without preconceived notions of how it “should” be. There are so many still lifes to choose from in art books, magazines, online etc. I will leave you with 4 wonderful examples to share with your little artists. Thanks for reading.
Cheers! Karen

Still Life with Apples, a Pear, and a Ceramic Portrait Jug (1888) Paul Gauguin (1848-1903)

Bouquet (1599) Jan Brueghel the Elder (1568-1625)

Pfirsichzweig (Peach Twig) (1630) Georg Flegel (1566-1638)

Dishes and Fruit (1901) Henri Matisse (1869-1954)